Monday, September 5, 2011

Accurate light and the Australian Costumers Guild Ball

In an earlier post I mentioned I ran out of time and money to locate, and obtain a more accurate lantern for the top. Suffice to say, before the TARDIS's next public outing I wanted to rectify this. After trawling Ebay for weeks I finally found a suitable lantern. It's made of acrylic, and is a modern copy of the correct fresnelled marine lens (the originals were made of glass). Cost a pretty penny, but alas I wanted accuracy dammit! Especially now there was a spiffy light that actually worked.

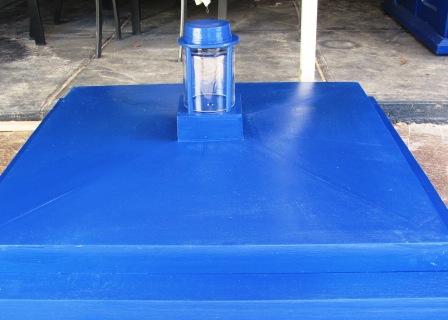
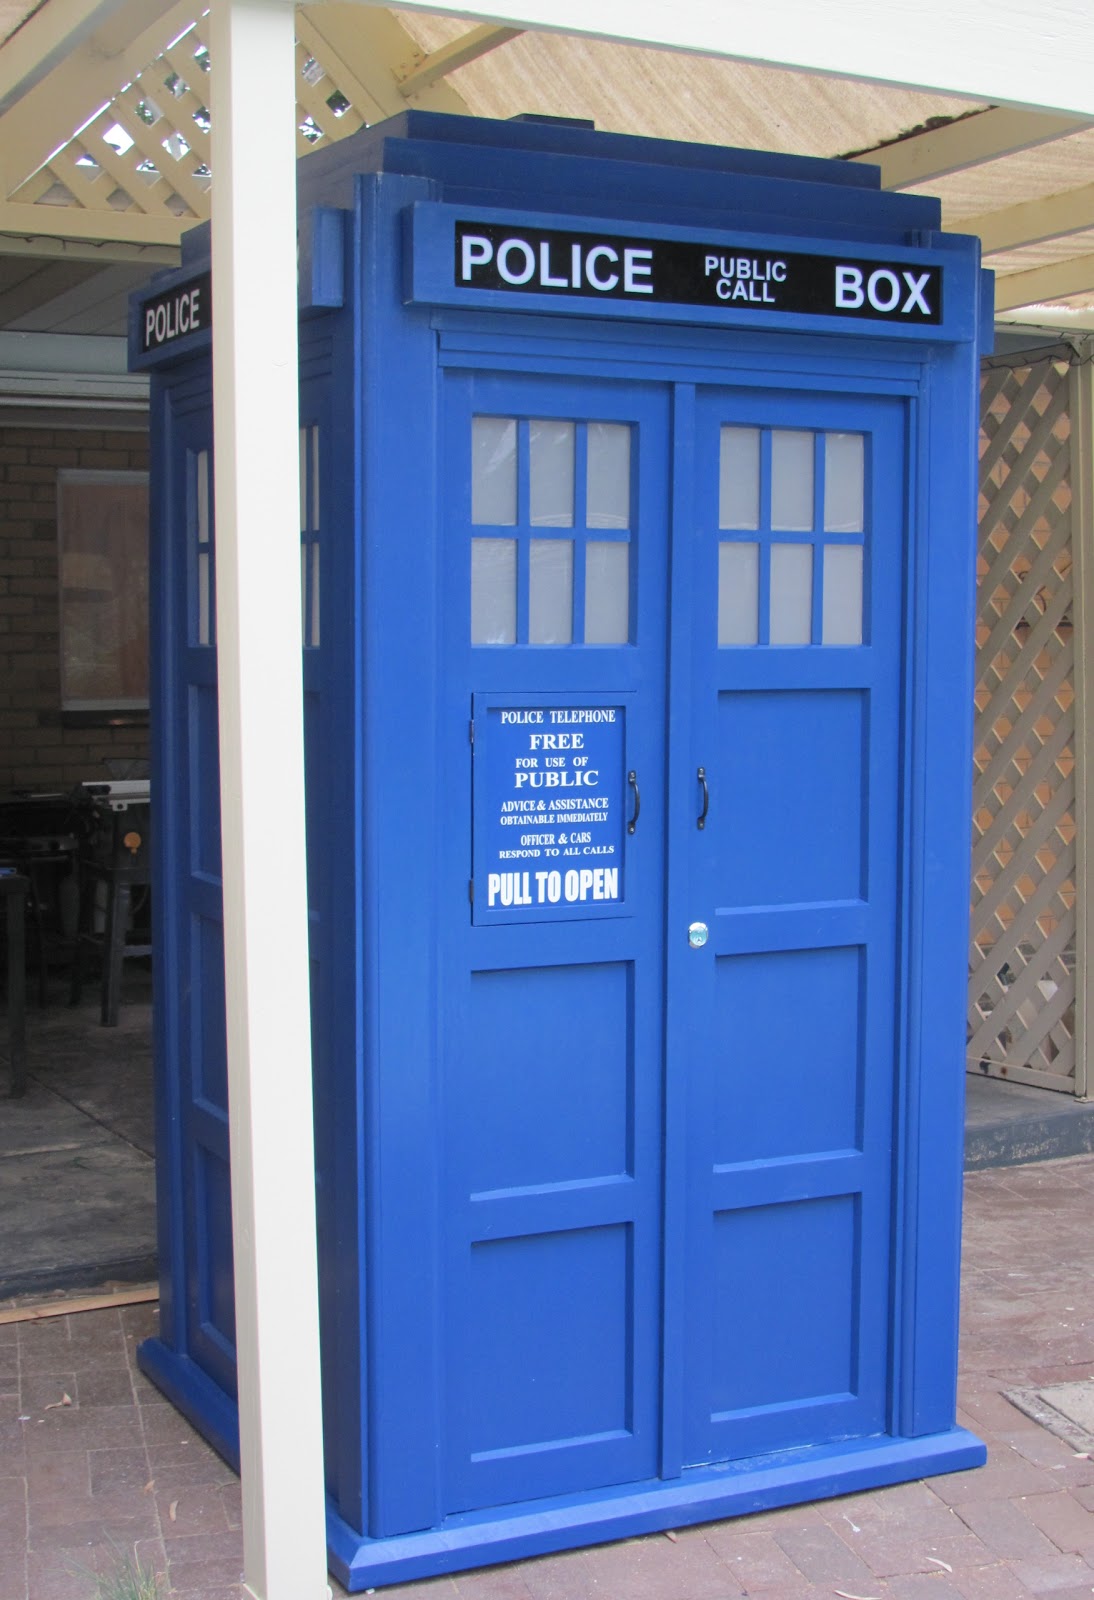
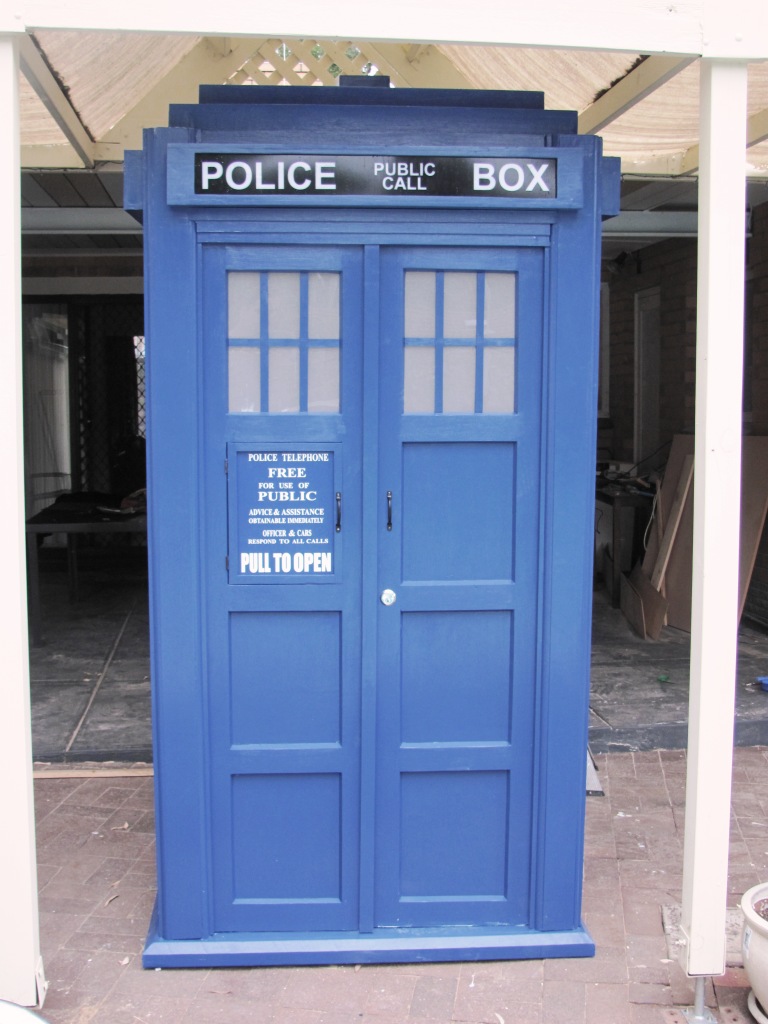
So an afternoon of work and fitting, it was in. The uprights are the same dowels as before and the 'hat' or dome is actually a cheap plastic exterior light I came across at Stratco which just happened to be a perfect fit. Fresh coat of paint and we're done!

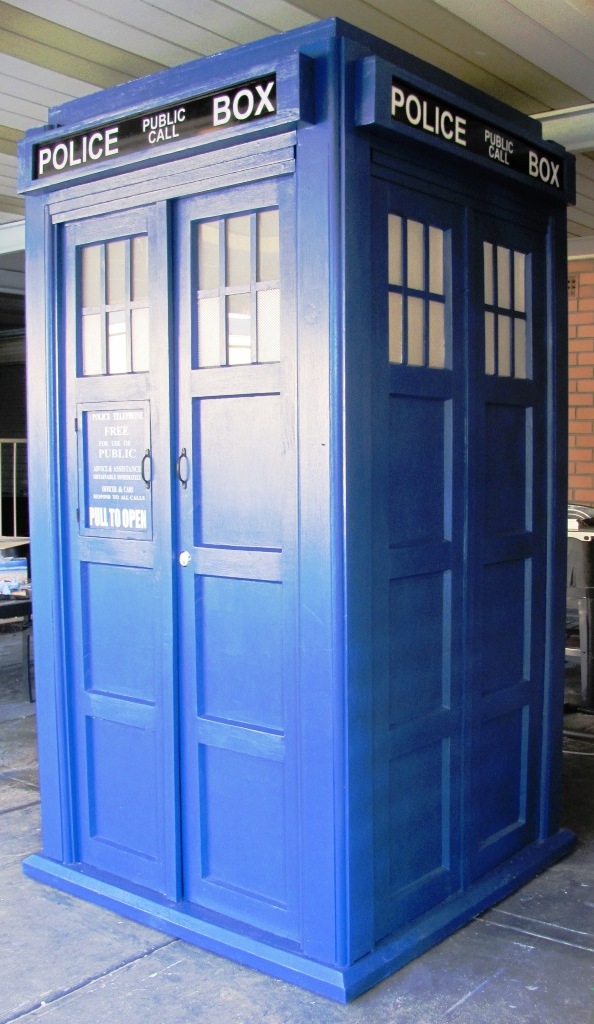
Thus the TARDIS is complete. However as the National Australian Costumers Guild Ball was approaching I was beginning to wonder about how to transport it. The last saga with getting it to Armageddon, I really did not wish to repeat, there had to be an easier way!

And there was... The roof and the sign boxes were already removable, I modified the sign boxes for the side slightly to make them 'slide' into place rather than screw in. With that modification, the side walls could be unscrewed at the corners and slid out. The front and back were unscrewed from the anchor points as single slabs (doors, sign boxes and all). These two are pretty heavy, but manageable. Then the base can be moved, so ultimately it came apart in 8 pieces and could be transported in the family trailer. No more hiring a trailer!


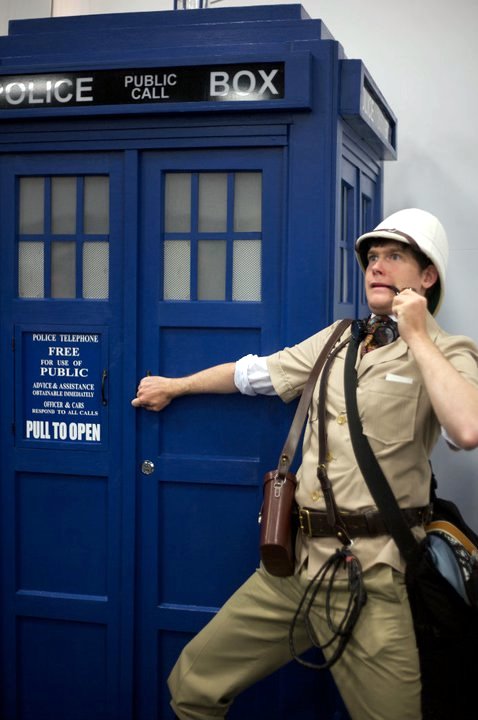
So here it is, complete and in place at the Australian Costumers Guild Ball, where it was a feature for our costume parade skit.

There was several doctors at this year's ball. Thanks again to Eman and to Catherine & David for the pics.


Additional Updates

After sitting under my pergola for some months following the TARDIS' debut at Armageddon Adelaide, I felt the time was nigh to add lighting to the interior and also to create an electronic sound board.

I'd been researching the soundboard idea on the net for some time, looking at a basic wiring video provided on YouTube by a guy in the USA (he's fond of 'soddering' whatever that is...)

Anyway this is his video:


So I was able to identify some of the parts and then order them online myself from Electronics123.com. The remaining parts I got from the local JayCar electronics here in Adelaide. 


Not quite as neat as this fellow's layout, but I incorporated my own into a black box that is mounted on the back wall of the TARDIS. It has a little more flexibility as there is a permanent line in jack, so I can either use the pre-saved TARDIS sound on the soundboard, or with a standard audio cable I can plug in a laptop, MP3 player, phone or whatever and play sound files through the TARDIS. There's also a permanent mounted powerboard inside to which the interior light is plugged in. So ultimately there are two lights, the lamp on top that lights up with the sound, and the standard interior light, which lights up the windows and the sign boxes. Very effective in low light!


I made a video like the one above of my own soundboard.


So at left is the TARDIS with the interior light on (with flash and without flash) sitting under my modified pergola. My wife was very understanding when I told her we had to add an extra peak to our pergola to accommodate the TARDIS. You may remember earlier posts that mentioned it wouldn't fit with the roof on. The shade cloth on the peak is covered with transparent plastic to keep the rain off. Only when it rains really heavily does the TARDIS get wet and even then only the bottom foot or so gets damp. The bottom has a very thick coating of paint, and realistically it rains that heavy only maybe 10 times a year so it should be okay for some time.

Friday, March 18, 2011

Armageddon Expo Adelaide

So the TARDIS had its debut at the first Armageddon Expo to be held in Adelaide. As I hadn't made it as dismantleable (is that a word?) as originally planned, I had to hire a trailer to transport it in almost full form.
But alas I hadn't counted on the fact that my carport roller door only goes 190cms high! The box is several inches taller than that! So we tried to tip it on its side, only to find the carport roof was not tall enough to enable it to even tip over without catching. I was close to accepting defeat until we realised we could push it out onto the backyard and tip it over. At this stage it weighs about 120kg I estimate. So we had to rest is sideways on a sack-truck and push/slide it out onto the trailer on its side. It then rode the entire way on its side in the trailer. At set up, it had encountered almost no damage from the journey thankfully, a little scuffed paint on the base at the back. So with four men at the other end we picked it up off the trailer and wheeled it in on its castors into the convention. The carpark was rough concrete and promptly disintegrated two of the castors. Oh well at least I didn't need the brakes on then.


So here it is , completed and on display at Armageddon Expo Adelaide. It was a massive hit with tonnes of people having their photos taken in front of it. I used it as a change-room and storage for my costumes and other stuff from the Costuming SA stand! People freaked out when I'd pop out of it. Most amusing. Here's Turncoat Studio's video of the con, featuring said Tardis.


Originally it was to be part of our stand, but the organisers essentially commandeered it and placed it near the photo booth and celebrity signing area. I wasn't fussed.


Getting it home was much easier now that we knew how to do it. Next up is to find a correct lens and to re-engineer it so I can dismantle it. I can't be spending over a hundred bucks each time to hire a trailer to take it places and needing another bloke to assist.


Here's some other pics. Emmanuel I hope you don't mind me using them ;)


Sunday, February 27, 2011

The End - Finished... for now.

This afternoon and evening I spent finishing the TARDIS. I bought a glass jar yesterday which has worked out perfectly for the top lamp, which was the last piece remaining. It's not fresnelled however, but does the job. At this stage a vegemite jar probably would has sufficed as I just wanted it finished!


The jar in place with some dowels and a round piece of MDF. It's supposed to have a dome shape on top, but I'm all out of domes, so I used a bog tin lid and glued it on.


And here is it painted and attached. It's probably off centre still, but I think looks the part. One day I'll put some kind of reflector inside and maybe even rig up a light.


The rest of the afternoon was spent putting the rippled glass effect in the bottom corners of every window frame. I used a broken skylight lens and cut it up using a cutting disc on a dremel. This puts out loads of fumes so I feel a bit off colour right now from it! Each window frame is slightly different so I had to make each one for a specific frame, required much filing (I cheated and used a bench grinder as a file). They certainly aren't perfect but most stick in without any glue.


So the TARDIS is finished! Alas I can't take a photo of it all complete because it's too tall for the porch and I need muscles to get it off the porch in the backyard. Next weekend at Armageddon I'll take some complete photos.


Special thanks to Frif and my Dad for help with some of the labour, the signage and with tools. Total cost of all parts, paint, fixings, is $699. It would probably have hit the grand if I had to pay for the window glazing and the top signs. Probably take a few bucks off too I guess, because I bought some things that I didn't end up using for this, but will no doubt use elsewhere in the future.


*I never bothered doing the corner post caps.

Saturday, February 26, 2011

Signs and windowframes

Well, the end is definitely in sight! My friend came through with the Police Box stickers, which we put on the white perspex backing. Now I was to learn that for some reason sticking vinyl to perspex is 100 times harder than sticking to glass. The spray bottle and detergent trick didn't actually help with sticking it on, but made it harder and as such there is quite a lot of small bubbling in the signs. It doesn't show from a few feet away, nor in pictures thankfully, but enough that it's mildly irksome for me. Anyway they're done. Alas the crispness of the signs now highlights that the signboxes are not perfect either. I guess as the creator I'm my own worst critic.


My friend wasn't able to get the phone panel sign done, but as this was a small and quick one we took a trip to the sticker guy at the Brickworks to make up. I had the file from somewhere on the net, but the signmaker altered it slightly for size, and also as he didn't have the correct fonts. Again, it's near enough. I think it looks pretty impressive on the panel. The 'Pull to Open' bit is probably a little large, but the sign's a good fit for the panel.


Today we did a test fit of the signboxes and the both roofs in place, we had to move the whole box down onto the paving so it could clear the porch roof. With several layers of paint the second roof panel no longer fits inside the first roof panel, so there will be some sanding to get that right. Also from above there's some spacing between the first roof and the signboxes they sit on, which I may fill with a piece of fabric or something. But then again unless you're nine feet tall you wouldn't see it.


I've just realised I forgot to make the corner post caps! Ahh it's never ending.


Anyway here's another photo, note that I finally made the window frames. I kind of cheated by making 2cm strips of MDF and just sticking them to the perspex and painting them afterwards. Yes I should have painted them first. There was a fair bit of cleaning required to get it off the glass again.There's no outer edging to the frames but at this stage I don't really care.


So remaining is the lamp (which I found a nice jar that is suitable), and the pebbled glass pieces for the corners of the window panes. I may have injured myself lifting the box down onto the paving. It's ridiculously heavy. I'm also rather concerned about how I'm going to get it out, given the carport roller door has a rather shallow opening height.

Thursday, February 24, 2011

Repainting and windows

So after allowing the paint to dry on Monday, I really wasn't happy with the colour. It looked too bright, yet dark, if that makes sense. Kind of like 11th doctor Matt Smith's TARDIS only bluer. Like this (kind of) -->


I guess that's okay if I was making that one, but I'm not and I don't want people to think that I was trying to. I really wanted a cross between the Hudolin 1996 film prop and the TYJ 1980's show prop colour.


This chart shows the different colours, simplified for your PC. I added some grey to the paint which made it way too light (like the Newberry prop 3rd from left), and then some black went in to bring it closer to what I want. Currently it's a cross between Newberry and Hudolin (2nd from right), but not as much like the TYJ (between those two) as I'd hoped. At this stage I'm forgetting about the paint. It's close enough.


So this is what it looks like. Again the PC screen really alters the colour, it's a fair bit darker, so to see it for real you're just going to have to go to Armageddon to have a look. 


The real win was getting the window glass. I was quite concerned about where I would find frosted perspex that wouldn't cost a week's wages, until the maintenance man at work came to the rescue. I was asking him about broken fluoro light guards as a possible source and he took me into his storeroom and showed me this giant piece of frosted perspex that had a crack in it. So out to the ute to bring it home. It was just enough to do every pane! I'm talking within 10mm of running out it was that close! Currently working on the grid work for the windows, which I'll probably just stick to the glass using 20mm strips of MDF. 
Still need a lamp and some signs and then I'm done!

Whoo a door lock

Yep, put the door lock in. Thrilling. It was quite a bit more complicated than it needed to be, simply because the TARDIS door is much thinner than your average house door. Thicknesses had to be built up under the lock for it to work correctly. Also so the barrel looks in the right spot from the outside, the lock itself sticks out across to the fixed door a little further than natural on the inside. It all worked out in the end as I needed to build up the base for the striker plate and it lined up nicely. No pics of the inside showing the lock, but here's the outside. Yes it should be an antique brass colour, but I botched that when I bought it. Plus silver was like $15 cheaper - go figure.

Monday, February 21, 2011

Paint

Alas today is my last day off work until the bump-in day for Armageddon on March 4th. I spent the entire day painting, so I would feel like I had made some major progress, as I'm starting to freak out about the remaining time. Paint was a bit of a drama as I've found that the major supplier of paint base in Australia is based in Queensland and had been damaged due to the flooding. This supplier makes Dulux and British Paints and probably others. As such, supplies are getting low and both Stratco and Bunnings were out of stock. I had to go to the Solver Decorator Centre who took my colour swatch and fortunately they had the code for it, so they were able to make me up some.  Alas the colour didn't come out of the can quite like it looks on the swatch! Straight out the can it was very bright, like Gordon the Big Engine blue, but I knew paint dries darker. 


This is probably as close to the actual colour as my camera will allow. In some light it's spot on, but in sunlight (and probably fluoro lighting) it'll look too bright. This is the two roof pieces and the four signboxes.


The whole box painted in two coats. This paint was very thick and caused some pretty pronounced brush marks. Not sure of my opinion on this. I'm probably my own biggest critic. Alas it's simply too bright, and the next coat I'll dilute the blue paint with a slosh of black. 


Still have to make the window frames, window glass/perspex, find a lantern and have signs printed. It's going to be close.

Sunday, February 20, 2011

Sanding and filling and undercoat

A good friend came down from Clare today to give me a hand with some laborious work, sanding and filling primarily and cutting out the holes in the signboxes for the signs. He also brought down the perpex sheeting for the signs and will bring the actual vinyl lettering next weekend.


Oh and yesterday my Dad came over and helped get the box off of the base so I could paint the base and install castors. Castors sit about 5mm below the base so it can move about freely (without the brakes on it moves about a little too freely!)


The box is bloody heavy at this stage, it was very difficult to get it to go back on its base and we ended up twisting it a bit and cracking the filler in several places. Oh well, refilled and sanded today.


Completed the roof today as well, sanded all the filler and gave it a base coat of that awful white paint I mentioned in an earlier post. Remembered to wear a mask so I don't get sick this time! The roof certainly isn't perfect, the angles aren't quite even and some of the filling is a little amateur, but it's the roof, Only if you are 9 feet tall could you even see it. The lamp box is still a bit off square too. I may see what I can do about that, although I may just leave it.


Whee, it's the roof complete and in undercoat.

Wednesday, February 16, 2011

Colour!

Finally, today whilst wasting 20 minutes I picked up some colour swatches from Bunnings. As always on the PC screen they look nothing like they do in my hand.


The one I like the best, as does wife, is the bottom right, a British Paints (how appropriate!) colour of 'Hello Sailor'


It's bluer than it appears here. And the mat they are on is a mid-dark brown not that light hessian colour it looks on here. Anyway I'll probably change my mind three times before I decide.

The Roof

In my awe of the stupendous step making that phone panel, I forgot to mention the petty little part I did make whilst coming down with manflu, the roof!


The roof is in two parts, I guess because it's easier to transport? I have no idea - that's what they guy whose notes I'm using as a guide did, so I did it too. Mine's loads different however, that other guy went the extra yard to make all the inside framework all shiny. I think mine fits together a little more sturdier anyway. It avoids any issues with future warping too as it's reinforced a few times. Actually I think I just answered the question, with all the reinforcing the roof would be too darn heavy in once piece to put on top!


Anyway, here's part one. A two stepped square frame. Exciting huh? It will have little cross pieces of the corner pillars mounted on it. I'll explain better when I makes them and stick them on. Lots of filling and sanding here, I used up my larger offcuts. I'm pleased to say I managed to use all the planks I bought, even the warped ones by cutting them into smaller usable pieces.


Roof Part Two. This part fits inside part one sitting on those corner struts. The box in the centre is the lamp platform. I have yet to find a lamp, I think a day soon will be dedicated to finding something suitable. Yes the box in the centre isn't exactly square. I plan to sand it square enough. It's only out by 5mm. I'm actually pretty happy that everything has turned out square to within a 10mm tolerance. Again loads of sanding and filling. That open bit has another piece on it now.


Here's what it looks like thus far with the roof stage one fitted and the doors aligned, and phone panel installed. I'd like to take a photo with roof stage two on, but alas this is almost touching the roof of the porch already so I may have to move it out to the back yard first.


Windows are next and the door lock, castors for the floor and then paint!


Oh and the dang lantern. It's supposed to look like this ----------------->


No idea where to get that in a hurry. I may opt for the cheap shop mozzie lamp that the 2005 series TARDIS used.

Phone Panel

So I felt a little better today after fighting off the man flu for the past 5 days so I managed to take some photos in the fading daylight rather than night time as I have been of late. Still haven't made alot* of progress as I've only felt like doing a little sanding and filling. I did , however make the phone box panel. You know the panel that says 'Police telephone, free for use of public etc etc.'


Anyway here's a picture of the correct version of the sign, which I believe is being made up right as I type this (give or take a couple hours). 


*Edit - I didn't end up using this one after all. The sign guy ended up being a bit of a pain, so I had a local sticker-maker make one up based on one from The Tardis Builders forum. (Sorry - don't remember who to credit!)


This sign then gets stuck on this panel I made. Pretty simple stuff, four pieces of wood borders two sheets of plywood with some hinges and a handle screwed on. The panel opens too, it's held closed with a magnetic catch. Pretty bodgy job with the catch at present, but it's just to hold the flap shut for now. Eventually I'll get around to making the actual cabinet in the recess and put an old phone in there.


The panel open. As mentioned this will be another box with a phone sitting here eventually.


Here's a picture of the phone cabinet on a toy, but you get the idea of what I plan to do.


I can't believe this whole post is about the phone panel.


* for Emma and Ainsley :)


Friday, February 11, 2011

Signboxes

Slow progress of late, been a little busy with normal life and now I'm sick with a cold, so not much will be happening for a while.

Latest update is three of the signboxes are roughly done, they still need endcapping and to have the actual signs made up, but the general concept is there. The basic shape is pretty straightforward. I had originally planned to shape the cut outs around the corner posts, but the gaps are pretty much hidden anyway so I didn't bother.

Just a close up. This was the part I had planned to shape. I did it on one of them, but totally unnecessary. Now the actual 'Police Box' signs I want to be printed in adhesive vinyl and stuck to sheets of white perspex. Alas there's no sign shops locally so I may have to go down the other side of town to Kwikstripe or something. I may see if the Council depot sign shop will give it a shot for me first.

So the front showing where I'm up to. I'm really hoping the slight lean is due to the fact that it's being built on the back verandah which has maybe a 5 degree slope to it. Eh whatever, it's not being built to win a competition. Looking at the actual prop from the 80's and I can see that Tardis is pretty rough in places too. It had probably been dropped a hundred times during production. Only the latest series ones are perfectly square and straight. 

So the remaining major construction is the roof and the windows. Then there's just a lot of filling, sanding, adjusting, putting in signs, the phone panel, castors and painting. Okay still a fair bit to go. I'll have to move it soon as you can see it's almost to the roof of the verandah.

Sunday, February 6, 2011

Walls are complete

So today was spent finishing the last two walls. All walls, doors, corner posts and the floor are pretty much complete minus filling sanding and painting.


Next job is to start on mounting the doors, finishing the staggered plates above the walls/doors and then onto the signboxes.You can see the staggered panel on this picture. I had made all four of them, but then botched the one for the front doors by cutting it too short. Measure twice, cut once as they say, which I thought I had done! Not sure how I messed that up. You may also be able to see how much straighter and squarer it now sits. Some of the small horizontals are not quite square though. I stopped using liquid nails for this reason, as when I make a mistake it's much easier just to unscrew them.


This is from another angle showing the wall and the doors. The left door will not open and be permanently mounted. This will assist is squaring up the front that just wants to lean to the left about 15 degrees.

Cornices and steel

The weather has finally changed, and is now actually suitable for doing this kind of work. I don't think there's been a day under 30 degrees when I've been working on this thing yet. I kind of subconsciously associate the heat with this project.


I'd pretty much got as far as I could with the materials I had and the amount of warpage that had occurred. With the better weather some warping had relaxed and I was able to salvage two planks by soaking them in the pool for a week. Alas the only way to force several panels to straighten is with steel reinforcement. My Dad did mention at the outset that I should have built the thing from steel to avoid the issues I have faced.


So I bought some of those angle supports used in timber house frames. They don't look pretty but they're screwed to the insides of the wall panels and they certainly do the job. Straightened up both top and bottom panels and now warpage is at a minimum. I still have a minor issue with the box not sitting square at the front, but I've worked out a way to fix that.


I finally bought some cornice material as Stratco had some cheap stuff in stock. Still at the incorrect 19mm, so I shaved a couple of mm off one edge. It fits okay, but is a nightmare to screw in as the cornice timber is denser than the box and the screws don't want to bite. Got there in the end with some force.


Cornices in place. There's three per corner post so twelve in total. I butchered one in the saw so I'll have to get another piece. Much filling and sanding still to go.

Monday, January 31, 2011

Heat, wall and more warpage

So the past two days have been 42 degrees plus which is taking it's toll, both in time and the integrity of the timber. I've barely been outside to do much at all, perhaps 45 minutes each day at most. Timber is warping every which way, which is a tad upsetting. I have several planks in the pool hoping they can be salvaged somewhat, but I'm not confident. Two of the remaining corner posts are now bending, so I'll have to take them apart and see what I can do. 


Beginner's tip: Don't buy the cheapest timber available and don't do anything in uber-heat. If I had managed to seal them first with paint the moisture loss would have been less. 


Warpage is less evident in the wall until I fitted it to the box frame. The cross pieces started to lift after one more day in 42 degree heat. One warped so badly it tore a strip off the plywood backing. The photos make it look better than it is.


So this is as far as I have got, one wall, the doors, the base and four uprights. I have to redo at least two of the uprights and you may be able to see the wall is warping too. I may try to salvage it by bolting the wall to steel cross braces. This looks okay in the photo but you can see the bend in the far left and far right uprights.


LOTS of sanding and filling to do. 

Friday, January 28, 2011

Build day whatever - doors and warpage

I'm giving up on naming each post as Build Day XX, as the past two days I've done maybe 2.5 hours work of work, which hardly qualifies as a 'day' of building. Work always gets in the way of doing important stuff.


So warp factor (okay that was going to be a stupid Trek pun) is pretty high on some of my long planks, I find it difficult to believe that only a few days I thought they were okay so I used them for the corner posts. All of the corner posts have a slight warp or bend to them, hardly noticeable except for the front right one which is ridiculously bent. You might remember in the first or second post that I thought it was an optical illusion? Well it wasn't.


So I took down one of the posts and pulled it apart to find that the warpage is so bad that two of the planks are now firewood. The other two I soaked in the pool and now have bricks on them so hopefully in the heat of the next couple days they'll straighten a bit and end up being salvageable. Alas I must go back to Bunnings and collect another plank or two.


But good news is the main doors are done! Almost perfectly square it means that the box is now resembling what it is supposed to! Lots of filling and sanding still required as my mitre cutting is a little amateur. Paint will probably cover up much of that too, or make it more noticeable.


So doors kind of in place. They are sort of just leaning there whilst I quickly took a picture before they fell down. Could really use a right side corner post here! Maybe tomorrow I'll get it fixed, although I think progress over the next week or so will be slow given the few days of heat we are about to endure.


Sawdust is getting everywhere, all over the back porch my car and now I'm finding it in the house. 

Wednesday, January 26, 2011

Build day three - walls

Well what do you do when family are over for Australia Day barbie? You get them to help you with your TARDIS of course. We actually got a fair amount done even though we didn't start until well after lunch.


Had to take another trip to Bunnings for more wood, but hopefully thats it for the time being, I should have enough now until it's time for the roof. Now Stratco is actually my preferred hardware store, somewhat better quality and range, but when I compare $42 for a sheet of ply at Stratco compared with $16 at Bunnings, there's no contest in the timber department.


Anyway the pictures don't show a lot of progress as it was mainly cutting lengths and making a mitre in the edges of several planks to make the framework of the doors and walls. We also cut the plywood for the doors and wall backing.


To cut and fit the walls it was necessary to put the uprights in, so finally it's beginning to resemble something box like. The struts right at the top are just garbage offcuts to hold the shape. I had a revelation about fitting the side walls and permanently mounting them to the uprights so they dismantle in one piece which sound like it should work.


Most of the day was spent cutting these to length and putting the mitred edge in, These are the door and wall uprights. There's 16 in total.


The first door panel, I'm yet to glue and screw the uprights in but you get the picture. The background colour on this photo kinda looks like the colour I want to paint the TARDIS, alas it's an illusion and is actually dark grey. My camera just does funny things in poor light. 


SO hopefully over the next few nights I can attach the uprights to my backings and have some walls and doors completed.